Showing posts with label DIY. Show all posts

Monday, August 8, 2011

Project: Plant Bench


Our plants were starting to take over all our chairs on our back porch.  So Zeke built a wonderful bench for them! I'm hoping eventually he'll make another one for sitting!

Monday, July 4, 2011

Kitchen Cafe Curtains


Since we're not planning to move anytime soon, we've started to make little improvements to the house here and there.  Replacing the old (and broken) mini-blinds with cafe curtains was our first step.

We bought a nice warm wood colored curtain rod and some cotton fabric from our favorite fabric store. Admittedly, this project took us two attempts.  The cutting board we have wasn't big enough to easily measure the fabric and we had to do all the cutting on the floor (not the easiest place to measure things well).

We followed some basic instructions on making the 3 different kinds of edges you need for a curtain of this type and learned that ironing folds before sewing them makes such a difference!

Next up, curtains for our big living room window.

Wednesday, June 22, 2011

Our Wedding Is In A Magazine!

Screen Capture from Eco-Beautiful Weddings

Our wonderful and awesome photographer Claire submitted our wedding to Eco-Beautiful Weddings, an online & print magazine specializing in green and DIY type weddings!

Check out the Summer 2011 Edition here, we're on page 86-88!

And yes, we know there is a little typo in there...

Sunday, May 8, 2011

Birthday Banner


We celebrated Zeke's birthday yesterday and I made another banner out of the burlap & jute bunting that we originally made for the wedding. I followed pretty much the same instructions as I did for the holiday banner except I used navy blue cotton fabric with cream colored thread.

Since we still have a lot of bunting left to use, perhaps I'll put some time in to actually making a tutorial one of these days...

Monday, April 25, 2011

Naturally Dyed Easter Eggs


We used these instructions from Apartment Therapy to dye eggs naturally! And the results were pretty great for a first try!


Step 1: Hard boil eggs and set aside to cool.


Step 2: Roughly chop up purple cabbage and place in a large pot with enough water to cover the cabbage and to completely cover the number of eggs you plan to dye. Bring to a boil and cover and simmer for about 30 minutes. Set outside to cool to room temperature.

Step 3: When the pot and contents have cooled, strain contents into a flat bottomed pot or jar large enough to submerge the eggs in.  Add about 1/2 cup vinegar (all we had was Apple Cider Vinegar) and stir to combine.

Step 4: Place the eggs in the mixture and place in refrigerator.  We let ours sit overnight.

A couple observations to consider for next time...
- The un-dyed spots you see on the eggs were the sides siting on the bottom of the pan.
- I picked the eggs up out of the dye matter with tongs and it appears to have scraped the dye off!  So next time I'll be more gentle!
- Apartment Therapy suggests rubbing the outsides with a bit of olive oil and I bet that would be a good idea too!

Friday, January 21, 2011

Driftwood Sign Holders


We knew we would need some sign holders for our table names, a guest book sign, and for our photo booth, so we made a special trip out to the coast of Washington State to gather some driftwood.


Zeke hand sawed 3/4" lines down most the tops of each of the pieces of driftwood (some eventually required a mechanical saw) and we printed all our signs on card stock to make sure they sturdy enough to stay upright.


So now we're left with all these beautiful driftwood sign holders with no idea what to do with them.  Any suggestions out there?  I would hate to just get rid of all of them.

Wednesday, January 19, 2011

Table Assignments


We decided to do table assignments for our dinner in order to give our guests some direction on where to sit, but also to give them the flexibility of choosing their own seats.


We imagined lots of little ideas for how we could do the table assignments and ended up painted a large cork board with a dark brown paint and using tiny sewing pins to pin little cards with the guests names and table assignment. Due to some unfortunate events, some guests had to cancel at the last minute, so I had to rewrite one of the cards myself, but it all turned out quite well.

Friday, January 14, 2011

Our Petal Toss Cones


We wanted to give something to all of our guests to be a little part of the ceremony, so we settled on a petal toss during our kiss (pictures of that later!).

We took the same Brown Bag Paper that we used for our invitations, folded the sheet in half, cut a half circle, and then cut down the middle of the fold.  We rolled these into a cone shape and sealed it with stickers from Paper Source. We then made two hole punches at the highest point of the cone and threaded a navy blue silk ribbon through the holes and tied a good square knot.


The cones were filled with freeze dried Peony Petals and hung on the back on the chairs.

Monday, January 10, 2011

Our Programs


Just like our invitations, we made the programs ourselves using Pages software and the beautiful tree that Amy created for us.

The inside had all of our wedding party and immediate family listed and the outline of our ceremony. The back had the names of our grandparents who couldn't be with us on the day and it also contained a couple of excerpts from my great-grandmother and grandfather's wedding book.

Friday, January 7, 2011

Burlap Table Ties


These were just a simple craft that really gave a good touch to the look of our wedding. They were just simple 3 inch wide and 2 feet long strips of burlap.

Friday, December 10, 2010

Blondie's Knits: One Thick Cotton Scarf


So as you may have noticed by our post about our first Seattle snow, it's certainly chilly up here in Seattle. Most of my scarves are also fairly thin on the width side of things, so I decided it was time to make a really thick one.
I can't stand wool, with the exception of cashmere, so I used on of my favorite yarns, Araucaina Nature Cotton. I did a simple 1x1 rib stitch for about 6 feet with 4 inches of fringe on each end. It turned out beautiful, heavy, and very warm!

Wednesday, December 1, 2010

2010 Holiday Napkins & Tablecloth


Since this was our first Thanksgiving in Seattle and our first Thanksgiving as a married couple, I wanted to make something special for it.

So I used the this pattern from the Purl Bee as inspiration and bought 4 yards of a cotton plaid fabric and 4 more yards of a cream muslin fabric. This is my first try ever making napkins or a table cloth and I think they turned out pretty okay for a first attempt.

Wednesday, November 24, 2010

A Holiday Banner


I've been trying to think of ideas of what to do with the 200 feet of burlap bunting we made for the wedding and one idea I came up with was to do a little holiday banner to hang in our living room window.  My favorite holiday items are of course the ones that say "peace", so I decided to use that.


First, I cut out the letters from a tomato cotton fabric by hand. Second, I cut the jute twine in between each  burlap triangle, because they were over a foot apart and it wouldn't have looked too good that way.  Third, I sewed the letters onto the each burlap triangle with a fairly wide zig zag stitch with a tomato colored cotton thread.  Fourth, I tied the flags together and cut the ends short.  Fifth, I made little slip knots on each end to hang it!


The banner fit perfectly in our living window and I'm thinking of making a smaller one for our kitchen on the left.  I think "joy" might be the appropriate holiday word!

Friday, October 29, 2010

Our Photo Booth


We had an idea that we wanted to do a photo booth at the wedding, specifically to give our guests a fun little activity to spend some time at during the reception.  However, this was something that really didn't come together too well until just before the wedding.


It all started with the gorgeous wedding quilt that my mom made us.  We wanted to display it and do something special with it at the reception.


We also happen to own a GoPro camera that we were able to set up and program to take still images every 10 seconds.  It has a bit of a fish-eye lens to it as well, so it gives a funny picture.


Trying to figure out a way to set it up was a challenge until a very obvious solution dawned on us.  We bought a bamboo garment rack back when we first moved to Seattle because we didn't have any closets. Since we moved into our new place, we've just been storing it down in the garage.  So we set up the rack and then zip tied a long wooden dowl to the top of the rack and then just hung the quilt over the top.  The quilt is big enough for a California King bed, so it has plenty of weight on it.


On a whim, I ordered some paper cut-out glasses from the Little Retreats Etsy Store and I'm so happy we did.  They were adorable and so much fun!  It was fun to see in the pictures which ones were the most popular.


The last piece of the puzzle was a little instructional sign.  We wrote, designed, and printed it ourselves and then placed it in same sign holders that we created out of driftwood gathered on the Washington State coast.

Stay tuned for a post with all of the wonderful photos that we got out of our photo booth!

Wednesday, October 27, 2010

Our Food

I'm working on another blogging project, Gluten Free Travelette, that I'm hoping to really make something of.  I don't know what my ultimate goal with the project is yet, but I have at least a general concept for it right now.  Anyway, I wanted to do a post about the food at our wedding which was tailored to my food intolerances.  In some ways having an almost entirely gluten and dairy free wedding seemed like a brave move at the time and we are so glad we were brave enough to do it. 

And getting back to the topic at hand, here is the post about our food that I wrote for my other blogging project;


Our wedding was approximately 97% gluten free and 95% dairy free. The majority of our vegetarian dishes were also vegan. So if you ever get married in the Monterey Bay Area and you're looking for a caterer that can accommodate a specialized diet, I would highly recommend Classic Catering in Pacific Grove, California. 


The only items with gluten were the blueberry and applies pies that we bought from The Buttery Bakery  in Santa Cruz, California and the beer we bought from Costco and BevMo. The story with the pies is that we tried to find a local bakery that would make gluten free pie's but we had no luck what-so-ever. And while I was prepared to make a couple of gluten free pies myself the night before the wedding, I certainly wasn't prepared to make 13!  


The only items with dairy were our tray passed apricots stuffed with goat cheese and pistachios, the honey butter to eat with the gluten free corn bread muffins, half of the stuffed portabella mushrooms which had some shredded cheese in them, and both the gluten full and gluten free pies which contained butter. 


I think the corn bread muffins were perhaps my favorite part of the whole meal and I think they were the favorite of the other guests that avoid gluten as well.  When I asked Classic Catering if they could make gluten free corn bread muffins I suggested to them that the mix by Bob's Red Mill is quite good. I don't think they used that mix though, because Classic's corn bread muffins were way better, and I find that impressive.  Gluten free baking from scratch isn't exactly easy to master, so I was very pleasantly surprised by the quality of the corn bread muffins. 


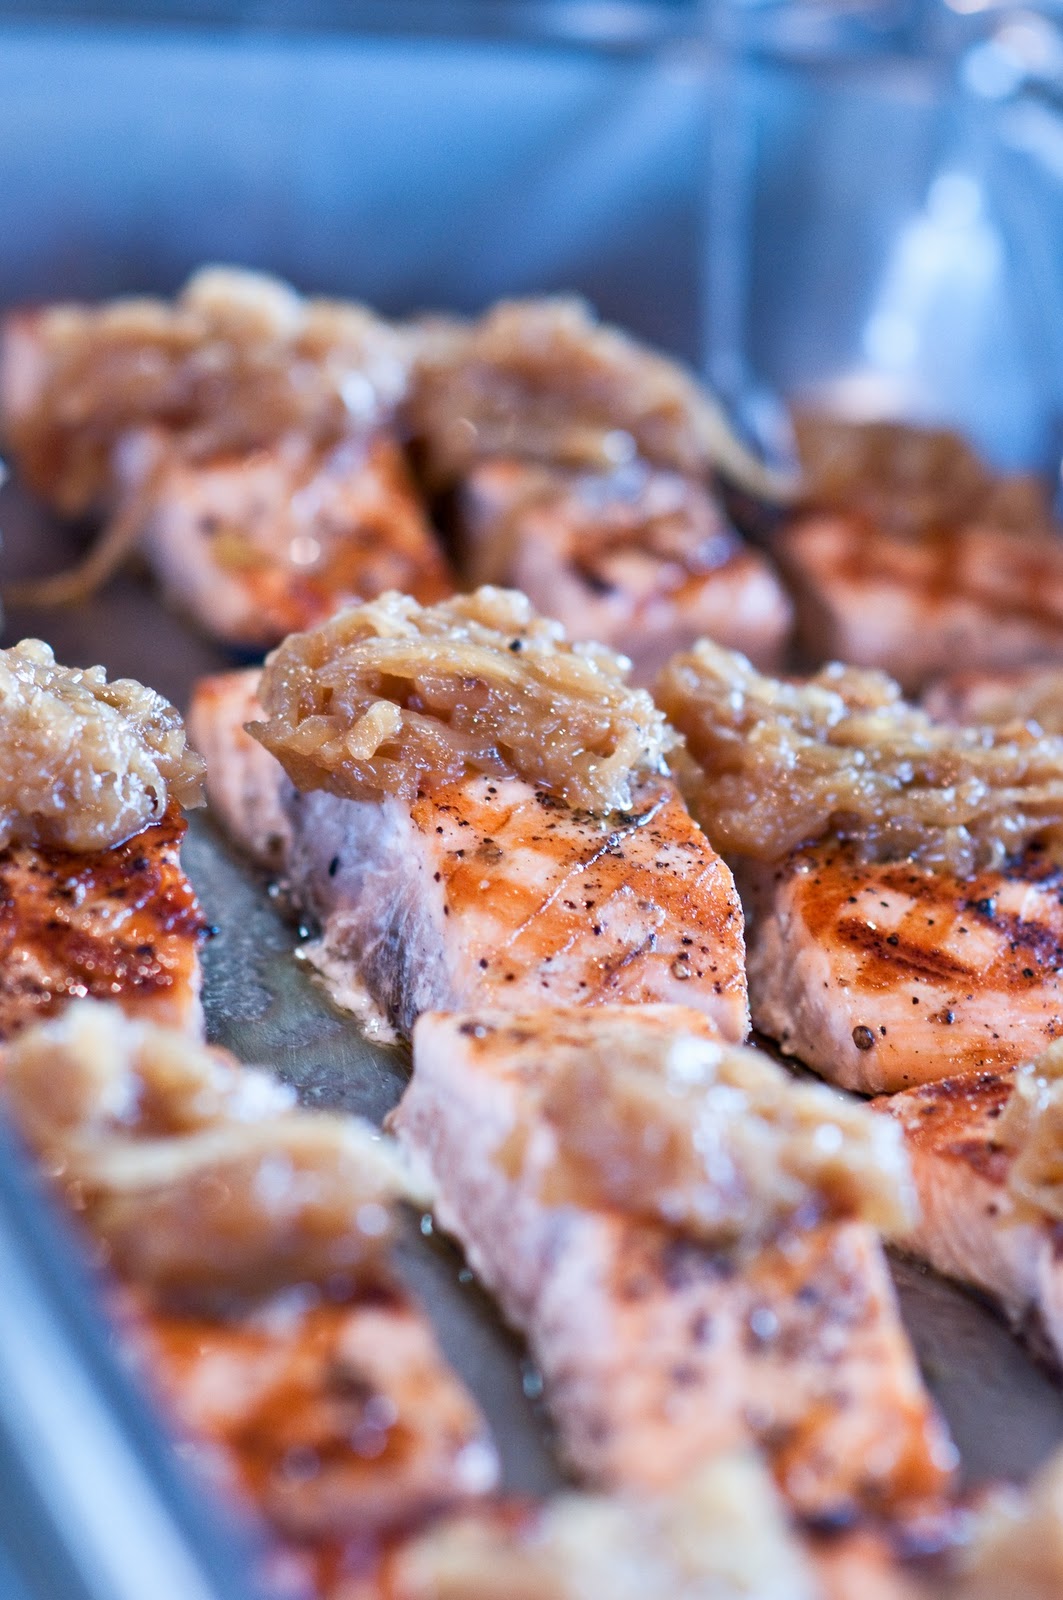
All of the food was truly amazing and we received lots of positive comments from our guests on how yummy it all was.  It's funny though, just like with our flowers the unseasonably cold weather of the year also affected our food.  We were supposed to have persimmon and blueberry skewers but Classic's Chef didn't feel the quality of the persimmons he had were quite worthy.  (Which frankly, I am impressed with because of the level of quality he gave us.) So the skewers became cantaloupe, blueberry, and persimmon skewers. 


Like I mentioned at the beginning of the post, we bought our gluten full blueberry and apple pies from a bakery in Santa Cruz.  But I made 3 gluten free pies after the rehearsal dinner the night before the wedding. To make it easy, I premixed the GF flour mix I developed earlier in the year in individual zip lock baggies.  Then I used thawed out gluten free pie crusts from Whole Foods to use as the crust.  I had originally planned on making 2 rhubarb pies and 1 blueberry pie, but I ended up not having enough rhubarb, so I improvised, again, the night before the wedding.  We ended up with 1 rhubarb, 1 rhubarb blueberry, and 1 blueberry. To be totally honest, the rhubarb pies didn't turn out so well and that was probably because I used frozen rhubarb.  The gluten free blueberry pie turned out amazing, but that was with fresh blueberries. To ensure that the gluten free pie made it to the gluten free guests, we gave the caterers little toothpicks tied with navy blue bows to stick in the gluten free pies to identify them.  (The toothpicks were another DIY by the lovely wife of our officiant and our groomsmaid.  


Toasts presented yet another opportunity to try something different to accommodate my specialized diet. Since I'm allergic to grapes, champagne was out of the question. So we ended up ordering a keg of pomegranate cider from Two Rivers Cider in Sacramento, California. It was wonderful as well. 

When we would tell folks that the food at our wedding would be almost entirely gluten and dairy free we got a lot of confused looks.  Sure we only had a couple of folks at our wedding with specialized diets that we knew about, but for anyone that knows anything about eating gluten and dairy free ... you can eat darn well without those ingredients and we wanted all of our guests to know that too! 

I would highly encourage anyone planning a wedding with guests on specialized diets to look for a caterer that can meet your needs.  One caveat to that though, I would encourage you to do a tasting with your caterer of the dishes you plan to serve at the wedding, just to make sure they really understand the special diets you are looking to cater to.  We went to two different caterers for tastings and explained my dietary restrictions prior to the tastings.  Classic obviously impressed us, but the other caterer actually served us dishes that I couldn't eat. So as always, do your research and don't be be afraid to go entirely gluten or dairy free (or anything else for that matter) for your wedding!

Our Photo Display


This project was easy and very quick, once we figured out how to actually put it together. It really only took us one evening to make it.

First, we cut two long strips of burlap and then I sewed pockets at the end of each with opening towards the middle of the display.

Second, we cut and sewed lengths of jute twine in between each of the long strips of burlap.

Third, we cut and painted two wooden dowels and then slid about 5 loops of burlap that I had sewn onto one of the dowels.

Fourth, we slide the ends of the dowels into the top and bottom pockets of the burlap strips. The dowel with the loops of burlap when on the top side of the system.


Fifth, we brought the display down to the wedding and had my maid of honor, Rachel, and my bridesmaid, Sam, pick pictures that we and our parents had collected to display.  We hung the display in a large window that looked out onto the patio we had dinner on, so we were able to double side the pictures!


Overall, I think this was a great project and really made a good conversation piece for all of our guests. I'm happy we did it and I hope someday we can find another use for this display!  

Sunday, October 24, 2010

Burlap and Jute Bunting


Back in August, I mentioned here that I had officially picked up all the supplies for all of the crafts I had committed to doing for the wedding.  And then in September, I had mentioned here that I had cut over 120 triangles of burlap.

And well, here is the final product!  Over 200 feet of burlap and jute bunting!


My mom and I started off the project together when she was out to visit for my shower by cutting all of the individual triangles and then starting to sew them to the jute twine.  It took a darn long while and it was messy!  I didn't realize how much the burlap would shed, it reminded me of short dog hair, like a dalmatian.


The night of the rehearsal dinner we asked our officiant, Geoff, and the groomsman, George, to hang the bunting over the dance floor. They did an amazing and awesome job and they came up with the design all on their own.


One of the best parts was how great it made all of our pictures look during our totally awesome dance party.  But more pictures of that to come later!

Our Invitations

We posted back in June (here and here) about making our invitations ourselves with the help of some amazing family! And rather than taking our own pictures to post here of our final product, we decided to wait for the official photos that our photographer would be taking and boy are we glad we waited!  Check these out!


The story behind our invitations is that when we were looking around for idea and everything we liked was earthy looking and had tree's on it.  So we decided to ask our sister-in-law, an amazing artist, to design some sort of redwood tree for our invitations.  She came up with this beautiful sequoia tree image and the stump you see on our RSVP card. Zeke's brother had them scanned at a high resolution and than our work began.  

We used Apple's pages software to design the images and text, which happened to be called "handwriting". Overall it was really simple to manipulate the images and place things just the way we wanted.

We made a main invitation, a rehearsal dinner invitation, an informational card, and an RSVP post card. 

We purchased all the paper at Paperzone up in Shoreline and bought two colors of card stock, a darker brown and moss green, along with the Green Grocer's Brown Bag Paper. We used our HP Inkjet printer and regular black ink cartridges to print everything and then used a double sided sticky tape to attache the Brown Bag Paper to the card stock. 


We tied a navy blue silk ribbon around all of the pieces and placed them in a Brown Paper Bag envelop with a seal from Paper Source that looked like redwood bark.

Overall, we are so happy that we decided to make the invitations ourselves. They turned out so perfect and so personal, especially because of the efforts of our family. And once we got the process started, it was really fun.

Sunday, September 19, 2010

Makeup Brush Roll

After taking a wedding makeup lesson and purchasing some brushed, I decided I needed a brush roll rather than just using the little plastic cases that came with the brushes.  So I just sort of jumped in and made one.


Since it turned out so successfully, I may try to re-create it, and perhaps, GASP! create a pattern and instructions!